
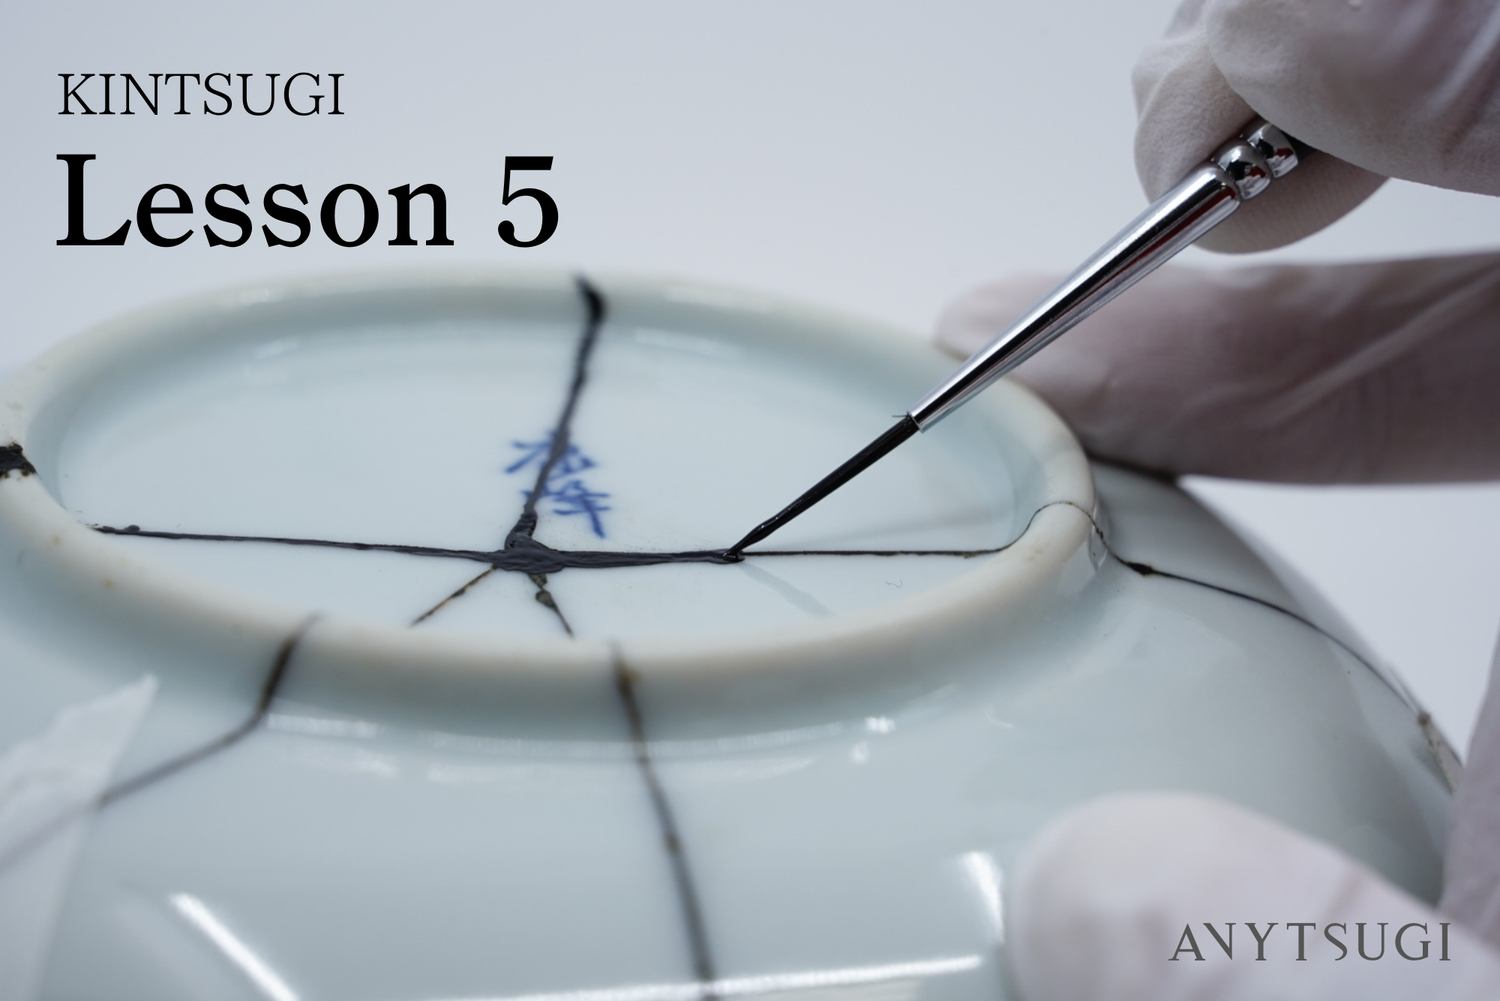

This is "ANYTSUGI Kintsugi Workshop," a six-part series on how to do Kintsugi. In this fifth installment, we cover the intermediate coat — preparing the base so gold powder adheres evenly.
Sand down the sabi-urushi surface that filled the fine irregularities, apply multiple coats of black urushi, and repeat the sand → coat → cure cycle 2–3 times. The care you take in this step directly determines how beautiful the final gold lines will be!
▼ Previous installments in the Kintsugi Workshop
→[Part 1: Preparing to Start Kintsugi]
→[Part 2: How to Repair Cracks]
→[Part 4: Filling Chips and Surface Irregularities]
Why Is the Intermediate Coat Necessary?

After filling chips with sabi-urushi, tiny surface irregularities remain that are difficult to see with the naked eye. Sanding the surface during the intermediate coat and building up layers of urushi creates the foundation for the gold powder to adhere evenly in the final step.
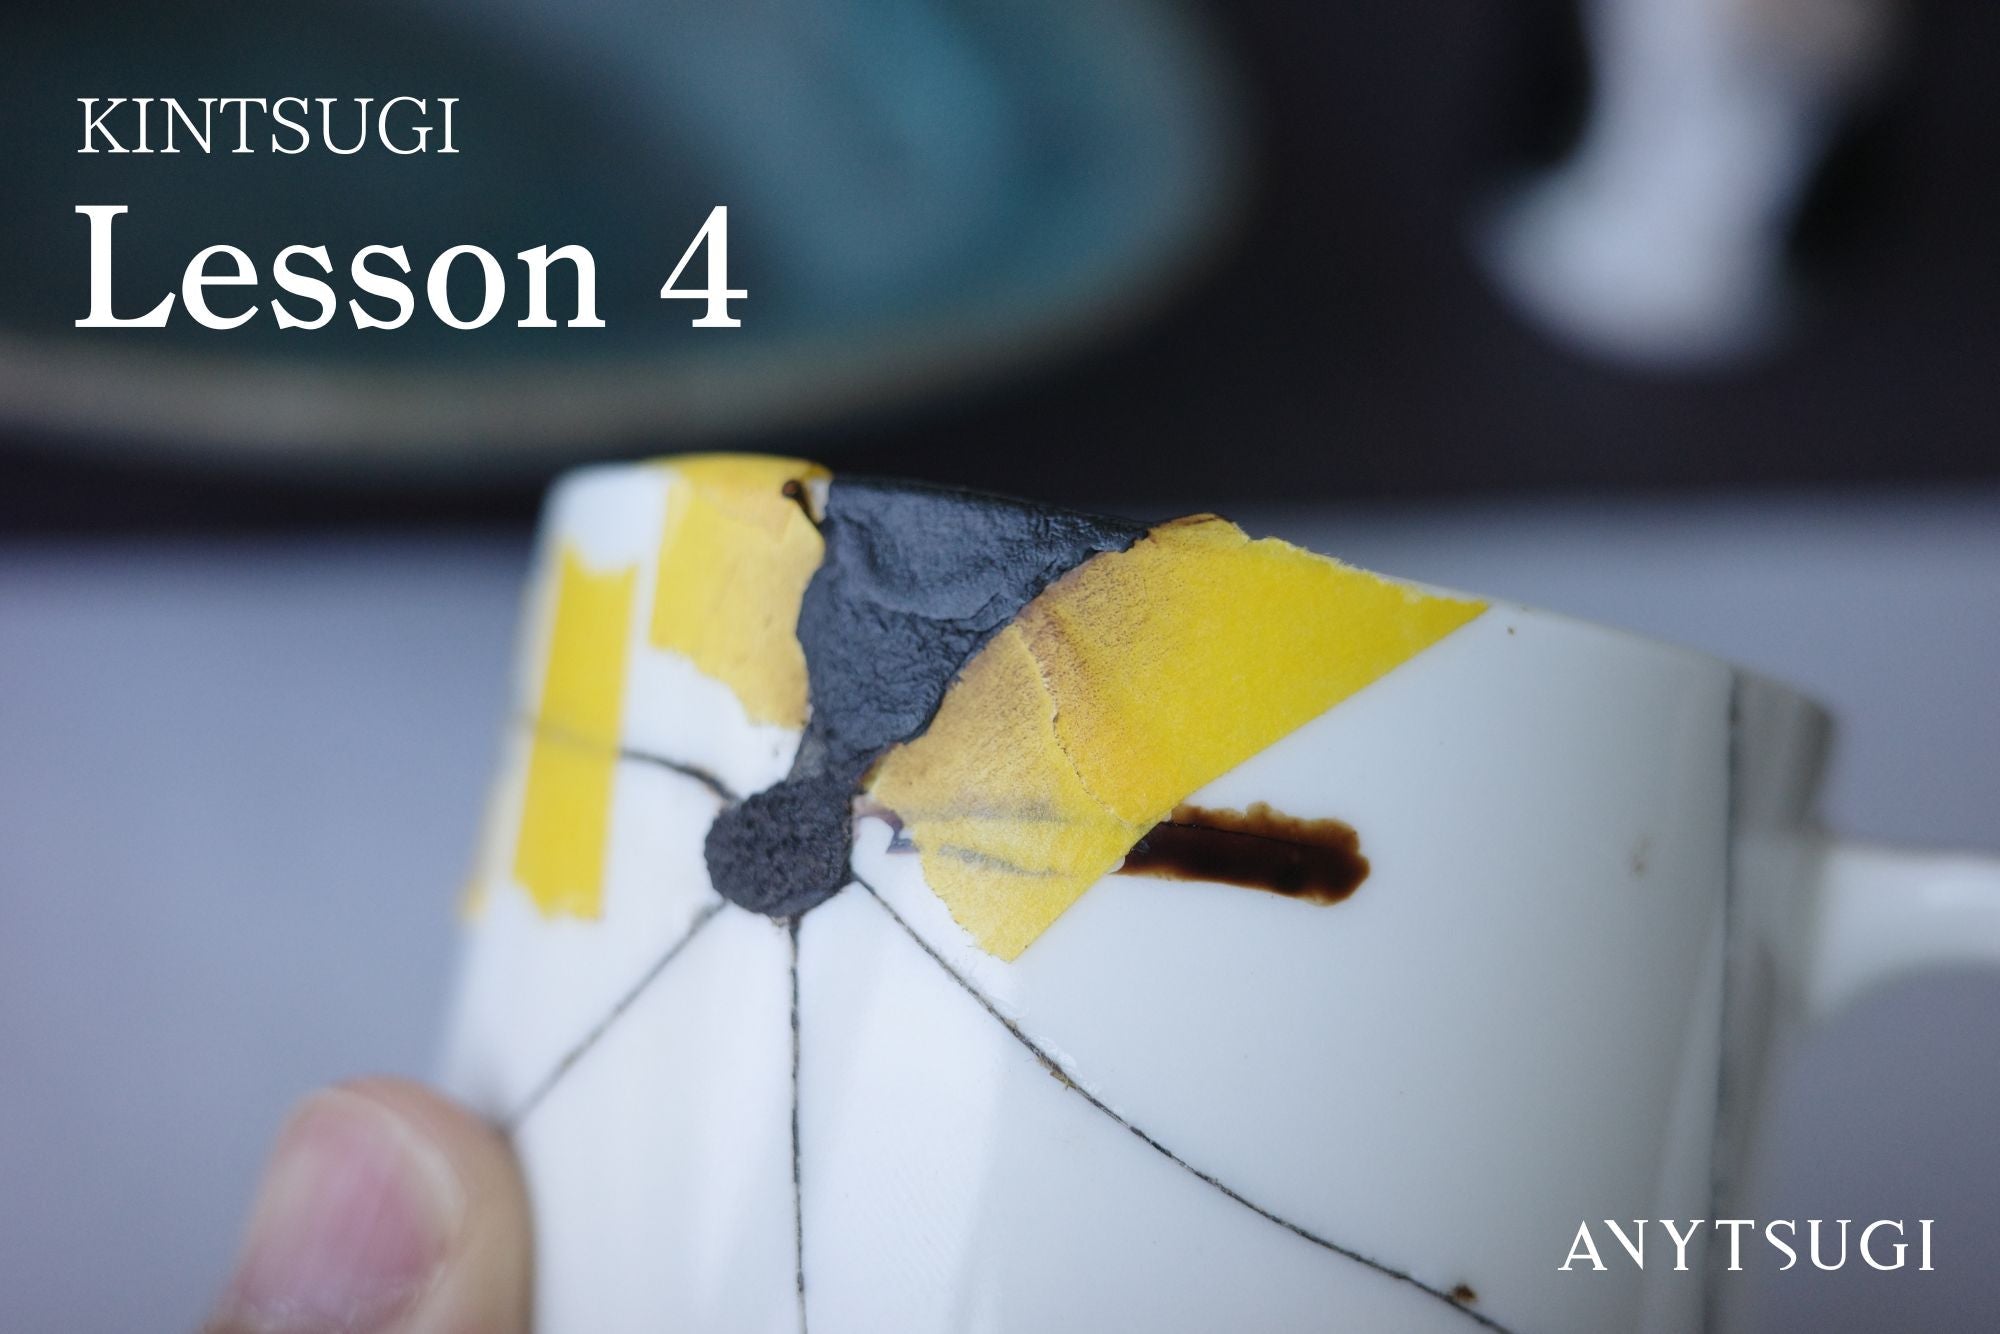
Step 1: Wet Sand the Sabi-Urushi
Tools and materials needed: Wet sandpaper (#600–#800), water, container for water, tissue paper
Start by sanding the cured sabi-urushi surface with wet sandpaper.
1. Cut wet sandpaper into roughly 2cm squares, fold into thirds, and soak in water

Cut the wet sandpaper into approximately 2cm × 2cm squares.
Fold each piece into thirds, soak it in water, and use it to sand the sabi-urushi surface.
2. Gently sand the sabi-urushi surface until smooth

Sand the sabi-urushi surface with the dampened wet sandpaper until the surface feels smooth.
※ If the wet sandpaper contacts the vessel's surface, it may damage any painted or printed decoration. Try to sand only over the sabi-urushi as much as possible.
3. Wipe away any residue and moisture with tissue as needed

Sanding will produce a dark residue from the urushi. Wipe it away with tissue paper. After sanding, run your hand over the surface — if it feels smooth to the touch, you're done.
Step 2: Make Black Urushi
Tools and materials needed: Palette, raw urushi, black powder, rubber spatula, spoon
The black urushi (kuro-roiro-urushi) used for the intermediate coat is made by spreading raw urushi out to expose it to air until it darkens, then blending in black powder (a pigment made from iron oxide).
It may come as a surprise, but urushi turns black when exposed to air. This is a chemical reaction between the enzyme in urushi and oxygen — the same reaction that causes urushi to cure.
1. Place raw urushi on the palette — about 2cm in diameter

Start by placing raw urushi on the palette. Aim for a circle roughly 2cm in diameter.
2. Use a spatula to spread the raw urushi thin and keep exposing it to air

Use the rubber spatula to continuously spread the raw urushi out in a thin layer.
Alternating between spreading horizontally and spreading vertically ensures that different surfaces of the raw urushi are constantly exposed to air.
3. After about 3 minutes of spreading, the raw urushi will begin to turn dark

After about 3 minutes of continuous spreading, the raw urushi will shift from its original color to a dark brown or black.
Keep spreading until it reaches the color shown in the photo.
4. Add black powder to the palette — slightly less in volume than the darkened raw urushi

Add black powder to the palette in an amount slightly less than the volume of raw urushi.
5. Knead until no granules remain, pressing down firmly with the spatula

Blend the raw urushi and black powder together using the rubber spatula, pressing the black powder granules flat using the flex of the spatula until no granules remain.
The black urushi is ready when it drips slowly from the spatula when held up. If it runs off like water, it's too thin — add a small amount of black powder and adjust.

Step 3: Apply Black Urushi
Tools and materials needed: Palette, black urushi, brush
Apply black urushi along the repair lines.
1. Load a small amount of black urushi onto the brush

2. Apply a thin layer of black urushi over the sanded sabi-urushi

Apply carefully without leaving any gaps, but avoid applying too thick a coat in one pass.
The lines you paint during the intermediate coat will become the final lines that shine in gold. Taking care here makes a significant difference in the end result.
Tip for clean lines: Follow the break line with the brush and move from the elbow, not just the fingertips. Think of it as moving your entire forearm rather than your fingers alone.

What to avoid: Pressing the brush perpendicular to the break line and moving only with the fingertips. This tends to produce thick, uneven lines.
Almost everyone starts out moving only from the fingertips. The feeling is difficult to put into words, but after a few tries it tends to click. Don't rush — keep practicing.
3. Cure in the urushi bath for approximately one day

The next step involves wet sanding the surface of the black urushi.
Repeating the "apply black urushi → cure → wet sand" cycle 2–3 times progressively smooths the surface, producing a more beautiful result when the gold powder is applied.
If you're short on time, completing the cycle once is also acceptable.
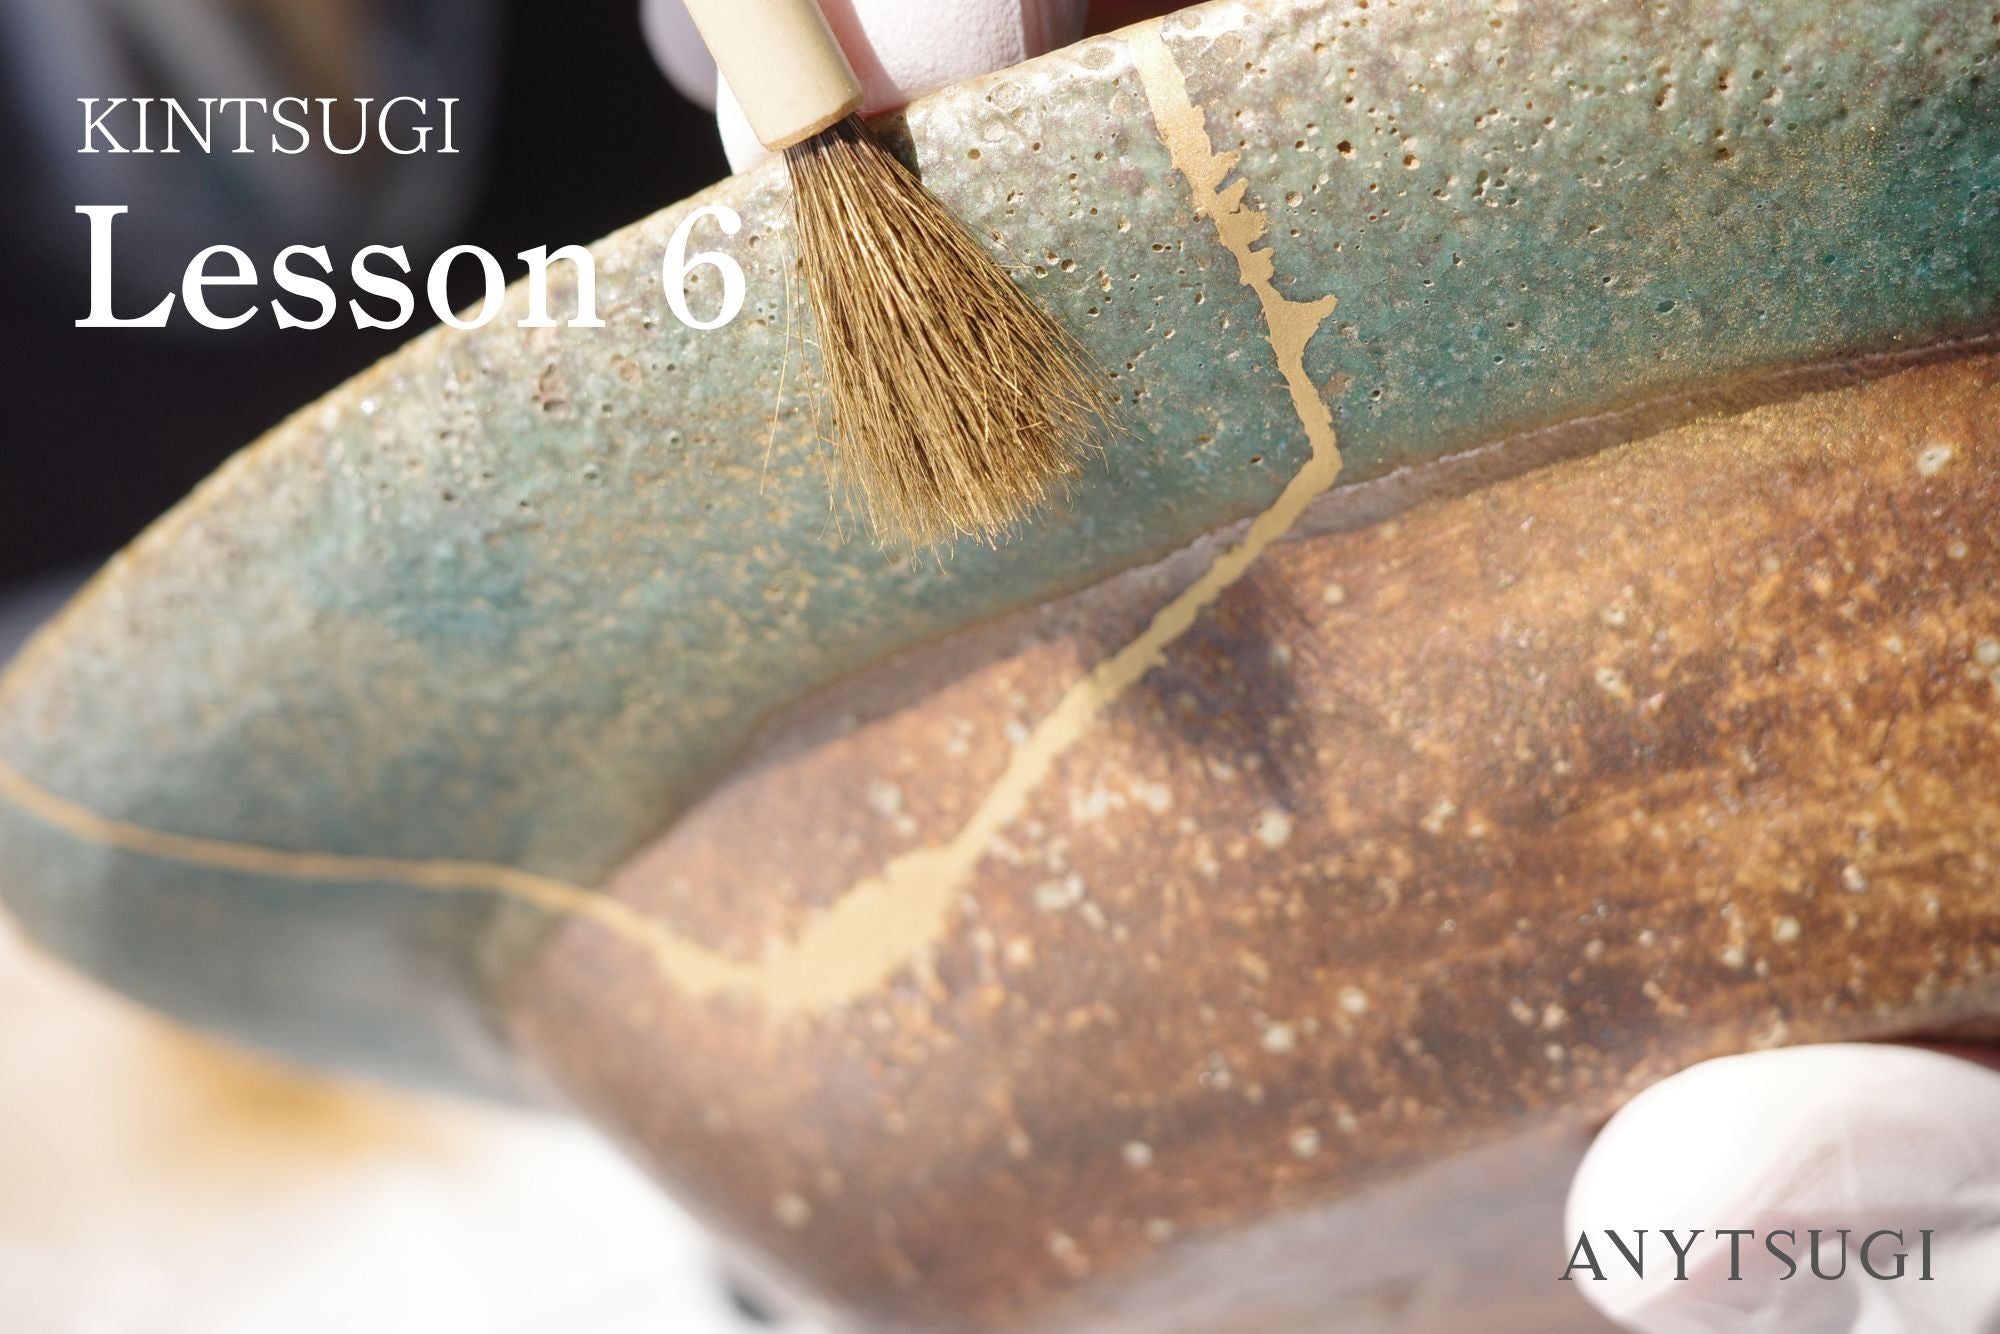
Once the Intermediate Coat Is Complete, Move On to the Finishing Step in Part 6
Once the intermediate coat is complete and the surface is thoroughly smooth, it's time to move on to the final step — applying the gold powder.
→ Proceed to Part 6: Finishing — Applying Gold Powder


![Kintsugi Arita Ware Plate with Peony and Quail Motif – Matte Gold Powder Finish [Free Shipping]](http://anytsugi.com/cdn/shop/files/kintsugi-finished_1.jpg?v=1773053961&width=1500)
![Kintsugi Arita Ware Plate with Peony and Quail Motif – Matte Gold Powder Finish [Free Shipping]](http://anytsugi.com/cdn/shop/files/kintsugi-finished_2.jpg?v=1773054067&width=1500)
![Kintsugi Gien Plate "Mode de Paris" - Matte Gold Powder Finish [Free Shipping]](http://anytsugi.com/cdn/shop/files/kintsugi-finished_8.jpg?v=1773053961&width=1500)
![Kintsugi Gien Plate "Mode de Paris" - Matte Gold Powder Finish [Free Shipping]](http://anytsugi.com/cdn/shop/files/kintsugi-finished_9.jpg?v=1773053961&width=1500)
![Kintsugi Arabia "Emilia" Plate - Matte Gold Powder Finish [Free Shipping]](http://anytsugi.com/cdn/shop/files/kintsugi-finished_16.jpg?v=1773053961&width=1500)
![Kintsugi Arabia "Emilia" Plate - Matte Gold Powder Finish [Free Shipping]](http://anytsugi.com/cdn/shop/files/kintsugi-finished_17.jpg?v=1773053961&width=1500)
Leave a comment
This site is protected by hCaptcha and the hCaptcha Privacy Policy and Terms of Service apply.